Take a look at your kitchen trash tonight. Banana peels, coffee grounds, the wilted half of a bag of spinach, eggshells from breakfast, the ends you chopped off an onion. For most homes, a big chunk of what goes in the bin isn’t really garbage at all — it’s food and yard material that could become some of the best soil you’ll ever put your hands in.
That’s the whole idea behind backyard composting. Instead of bagging up scraps and sending them to a landfill, you let nature do what it’s been doing for millions of years: break organic matter down into dark, crumbly, nutrient-rich compost your plants will love.
If you’ve never tried it, the process can sound intimidating — ratios, turning, worries about smells and rats. It really isn’t. I’ve kept a pile going through hot summers, freezing winters, and plenty of beginner mistakes, and composting is genuinely forgiving. Get the basics right and it mostly takes care of itself.
This backyard composting guide covers everything a beginner needs to know (see also our broader guide on how to start composting at home): where to put your pile, what to feed it, how to keep it healthy, and how to know when your compost is ready to use.
What Is Backyard Composting?
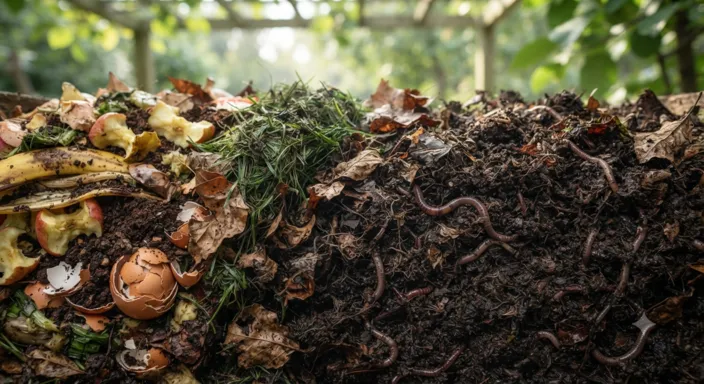
Backyard composting is the natural process of letting microorganisms break down organic material — like food scraps, leaves, and grass clippings — into a dark, soil-like material called compost.
“Backyard” just means you’re doing it outdoors at home, in a bin or an open pile, rather than sending your scraps to a city facility or burying them in the trash.
The work is done mostly by bacteria, fungi, and small creatures like worms and insects. They eat the organic matter, and what they leave behind is humus: a rich, earthy material full of nutrients and beneficial life that plants thrive in.
Here’s the part beginners find surprising. When food scraps go to a landfill, they get buried under tons of other trash with almost no oxygen. They don’t really compost there — they break down in a way that releases methane, a potent greenhouse gas. A backyard pile, with air moving through it, processes the same material cleanly into something useful. Same scraps, completely different outcome.
You don’t need special equipment, a big yard, or a green thumb to start. A corner of a garden, a simple bin, and a steady supply of kitchen scraps are enough.
Benefits of Outdoor Composting

Outdoor composting pays off in three clear ways: it cuts your household waste, it saves you money, and it gives you better soil.
Less waste, lower impact
Food scraps and yard trimmings make up a large share of what the average household throws away. Composting keeps that material out of the trash, which means fewer bags at the curb and less organic waste rotting in landfills. For anyone building a zero waste lifestyle, it’s one of the most direct, hands-on habits there is — the results sit right there in your bin and your garden.
Real money saved
Finished compost replaces products you’d otherwise buy. No more bags of fertilizer, soil conditioner, or expensive potting amendments every spring. If your area charges by trash volume or by the bag, a lighter bin can trim that bill too. Over a year, the savings add up.
Healthier soil and plants
This is where composting really earns its reputation. It improves soil structure — helping sandy soil hold water and heavy clay drain better — feeds plants slowly and naturally, supports earthworms and microbes, and cuts your need for synthetic fertilizers. Many gardeners notice stronger growth within a single season.
Choosing the Best Location

Where you put your compost matters more than most beginners expect. The right spot keeps the pile active — and keeps you actually using it.
Look for a level, well-draining patch of ground. Standing water will turn a pile soggy and sour, so avoid low areas where puddles form after rain.
Partial shade is ideal. Full sun all day dries the pile out and slows everything down, while deep shade keeps it cold and damp. A spot that gets some sun and some shade holds moisture without overheating.
Set it on bare soil if you can, rather than concrete or pavement. Direct contact lets worms, microbes, and insects move up into the pile on their own — they’re the workforce, so give them easy access.
Keep it convenient — the tip people ignore and later regret. If your pile sits in the far back corner of the yard, you’ll stop walking out there in cold or wet weather, and scraps will pile up in the kitchen instead. Close enough to use, far enough from windows and doors to keep smell and pests away from the house, is the sweet spot. A nearby water source helps too, since you’ll need to dampen the pile now and then.
Green Materials vs Brown Materials
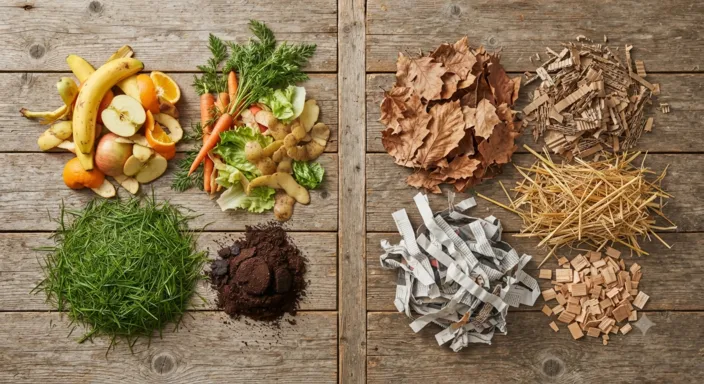
Every healthy compost pile needs two kinds of material, and learning the difference is the single most important skill in composting.
Greens (nitrogen-rich)
Greens are fresh, moist, and high in nitrogen. They give microbes the fuel they need to grow and multiply. Common greens include:
- Fruit and vegetable scraps
- Coffee grounds and paper filters
- Tea leaves
- Fresh grass clippings
- Green plant trimmings and spent flowers
- Crushed eggshells
Browns (carbon-rich)
Browns are dry and woody, and they provide carbon, the energy source for the pile. They also create air pockets and soak up excess moisture. Common browns include:
- Dry leaves
- Shredded cardboard and uncoated paper
- Straw and hay
- Sawdust and wood chips from untreated wood
- Shredded newspaper
- Dry plant stalks
What to keep out
A few things cause more trouble than they’re worth in a backyard pile:
- Meat, fish, and bones
- Dairy products
- Oils, fats, and greasy food
- Pet waste from dogs and cats
- Diseased plants or weeds gone to seed
- Glossy or coated paper
These attract rodents and flies, create strong odors, or spread disease and weed seeds into your finished compost. Some industrial facilities can handle a few; a home pile usually can’t.
Maintaining the Right Balance

Once you know greens from browns, the next step is balancing them. Get this roughly right and your pile will warm up, break down quickly, and smell fine. Get it wrong and you’ll know fast.
A simple rule of thumb is to use more browns than greens — somewhere around two to three parts brown to one part green by volume. You don’t need to weigh anything. Think in rough handfuls and layers. Whenever you add a load of kitchen scraps (greens), toss a couple of handfuls of dry leaves or shredded cardboard (browns) on top.
The other half of balance is moisture. A compost pile should feel like a wrung-out sponge — damp throughout, but not dripping. Squeeze a handful: you want it moist enough to clump, maybe with a drop or two of water, and no more.
Two problems show up when the balance is off, and both are easy to fix:
- Too wet, slimy, or smelly? You have too many greens or too much water. Mix in more browns and turn the pile to let air in.
- Dry and not breaking down? You have too many browns or not enough moisture. Add greens, sprinkle with water, and mix.
Most beginner compost trouble comes down to these two adjustments. Keep a stash of dry browns nearby and you can rescue a wet, smelly pile in minutes.
Turning and Aerating the Pile

Compost microbes need oxygen to do their job well. When a pile gets packed down and air can’t reach the center, the helpful aerobic microbes give way to anaerobic ones — the kind that work slowly and produce bad smells. Turning the pile fixes that.
Turning simply means mixing the material so the outside moves to the inside and air works its way through. A garden fork or pitchfork is the easiest tool, though a corkscrew-style compost aerator works too if you’d rather not lift and flip.
How often you turn depends on how fast you want results:
- Active (hot) composting: Turn every one to two weeks, or whenever the center heats up and then starts to cool. Frequent turning can produce finished compost in a few months.
- Passive (cold) composting: Turn occasionally, or barely at all. It’s far less work but slower — often six months to a year.
There’s no wrong choice here. If you’re busy, a low-effort pile still composts; nature is patient. If you want compost faster for a garden, turning more often speeds things up and helps the pile run hot enough to break down weed seeds.
A good sign you’re on track: a balanced, well-aerated pile feels warm in the center within a few days of being built or turned. That heat is the microbes hard at work.
Preventing Odors and Pests
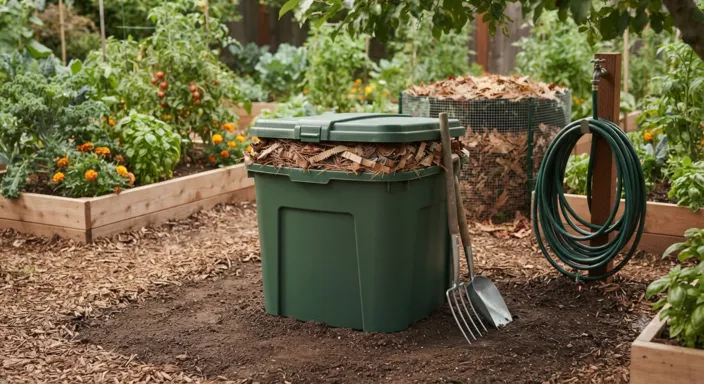
Done right, compost barely smells. A healthy pile gives off a faint, earthy scent like the floor of a forest. If yours smells bad, it’s telling you something specific — and the fix is usually simple.
A sour, rotten, or ammonia-like smell almost always means the pile is too wet and short on air. The greens have packed down and gone anaerobic. Add a generous amount of browns, turn the pile to work oxygen back in, and the smell clears within a day or two.
Pests are the other worry for beginners, and most of it comes down to what you add and how. A few habits keep rodents, raccoons, and flies away:
- Bury fresh food scraps in the center of the pile instead of leaving them on top
- Cover new scraps with a layer of browns
- Never add meat, fish, dairy, or greasy food, which are the biggest pest magnets
- Use a bin with a lid and a solid or mesh base if animals are common in your area
Fruit flies hovering around the pile usually mean exposed food scraps — covering them with browns or a little soil solves it quickly.
If you’ve followed the balance and turning steps above, you’ve prevented most odor and pest problems before they start. These issues are signals, not disasters.
When Compost Is Ready

Finished compost looks and feels completely different from the scraps you started with. You’ll know it’s ready when:
- It’s dark brown or nearly black
- It’s crumbly and loose, like coffee grounds or rich soil
- It smells earthy and pleasant, not sour or rotten
- The original materials are no longer recognizable (a few stubborn bits like eggshells or twigs are normal)
- The pile has shrunk noticeably and stays cool, even after being turned
Timing varies a lot. A hot, well-managed pile that gets turned regularly can be ready in two to three months. A passive pile you mostly leave alone might take six months to a year. Both work — speed just depends on effort and conditions.
If you’re not sure whether it’s fully done, try the bag test: seal a handful of compost in a plastic bag for a few days, then open it. If it still smells sour, it needs more time to finish. If it smells earthy and clean, it’s ready to use.
One practical tip: keep two piles or sections going if you have room. Let one finish while you add fresh scraps to the other, so you always have mature compost on hand.
Using Finished Compost
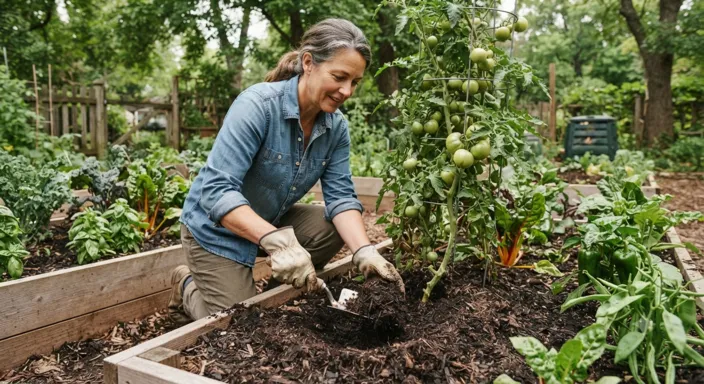
Finished compost is one of the most versatile things you can have in a garden, and a little goes a long way.
Here are the most common ways to put it to work:
- In garden beds: Mix a few inches of compost into the top layer of soil before planting. It improves structure, feeds the soil, and helps it hold moisture.
- As a top dressing: Spread a thin layer around the base of established plants, shrubs, or trees, and let rain and worms work it in.
- In potting mix: Blend compost with potting soil for containers — roughly a quarter to a third compost is plenty. Don’t plant directly in pure compost, since it’s too rich and holds too much water on its own.
- On the lawn: A thin layer raked across the grass in spring or fall acts as a gentle, natural fertilizer.
If you end up with more compost than your garden needs, share it with neighbors, use it on houseplants, or stockpile it for next season — it keeps fine in a covered bin or bag.
The first time you work your own compost into a bed and watch how the plants respond, the whole process clicks.
Frequently Asked Questions (FAQs)
Can I compost in winter?
Yes. Cold weather slows the microbes down, so decomposition nearly pauses in freezing temperatures, but it picks back up as things warm. Keep adding scraps through the winter and your pile will catch up in spring.
Do I need a bin, or can I just make a pile?
Both work. An open pile is the cheapest option and composts perfectly well. A bin keeps things tidier, holds heat and moisture, and deters pests — a popular choice for backyard composting for beginners. If you want a bin, see our roundup of the best compost bins of 2026.
Why does my compost smell bad?
A foul smell almost always means the pile is too wet and lacks air. Mix in dry browns like leaves or shredded cardboard, turn the pile to add oxygen, and the odor should clear within a day or two.
How long does backyard composting take?
Anywhere from about two to three months for an active, frequently turned pile, up to a year for a passive one you mostly leave alone. Warmth, moisture, balance, and turning all affect the speed.
Can I compost meat and dairy?
It’s best to leave them out of a backyard pile. Meat, fish, and dairy create strong odors and attract pests, and they’re harder to break down safely at home. Stick to fruit and vegetable scraps, coffee grounds, eggshells, and yard waste.
Do I need worms to compost?
No. Backyard composting relies mainly on bacteria and fungi, and worms usually arrive on their own when the pile sits on bare soil. (Raising worms in a contained system is a separate method called vermicomposting.)
Final Thoughts
Backyard composting isn’t a precise science you have to master before you begin. It’s a natural process you’re simply guiding along. Start with a decent spot, balance your greens and browns, keep the pile as damp as a wrung-out sponge, give it air now and then, and the microbes handle the rest.
Don’t wait until you feel like an expert. The fastest way to learn is to start a small pile this week, watch how it behaves, and adjust as you go. You’ll make a few mistakes, and our guide to common composting mistakes covers how to fix the ones that trip up most beginners.
What you end up with is less trash leaving your home, real savings in the garden, and a steady supply of rich compost made from scraps you used to throw away. For a single, low-effort habit, that’s a remarkable return — and one of the most rewarding steps you can take toward a more sustainable home.